|
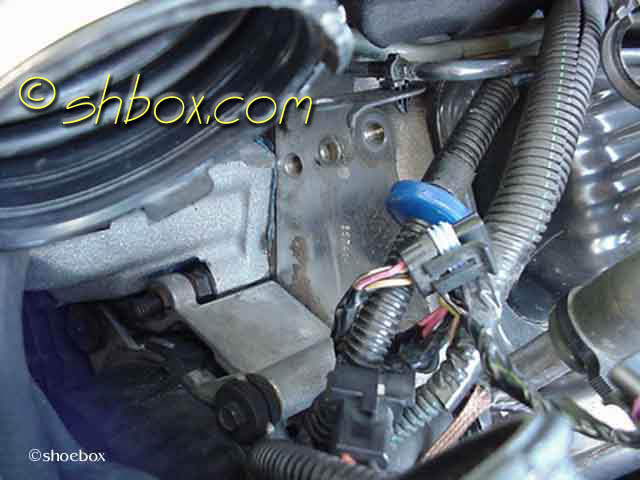
Located on the front of the LH head is the ignition coil and Ignition Control Module (ICM) assembly. This is an installed coil. It just happens to be after I installed my MSD Blaster coil. I did not take any pics before I took the old, stock one off ;-). I have a K&N FIPK, so all I had to do to gain access to the coil, was to take out the MAF and the rubber collar on the FIPK side. Remove the coil wire and two other harness connectors. There are two studs holding the coil on. You will have to remove nuts (9/16) on each stud along with a bracket and some ground lugs. Take care when removing the nut where the ground lugs are. If necessary, hold the stud still with a wrench to keep the lugs from rotating and possibly tearing loose from the wires. Lay the lugs out of the way. Remove the studs with a 9/16 deep socket. That is all there is to getting the coil out. |
||

|
||
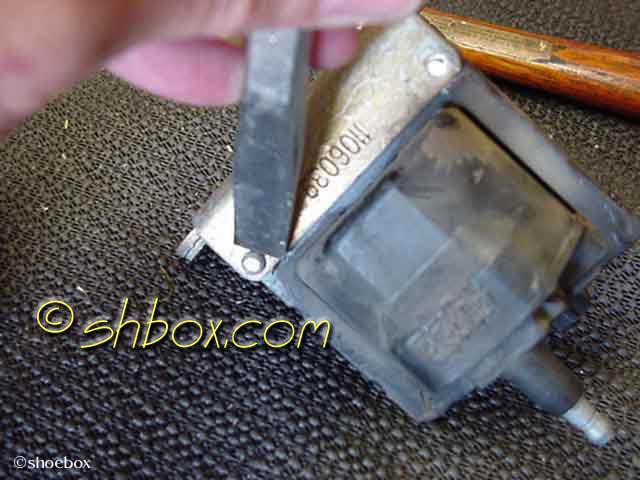
| Here, the coil and bracket assembly has been removed for service. | ||
|
||
| At this point you, have to separate the old coil from it's mounting assembly. | ||

|
||
| Exploded diagram of coil mounting assembly. | ||
|
||
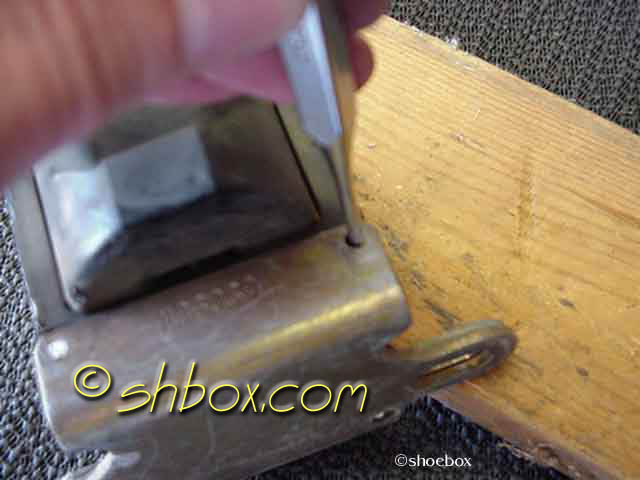
| Chisel or grind off rivet heads. | ||
|
||
| Punch out the rivets. You may wish to use a block of wood for some support. The coil assembly is a little wobbly because of it's shape. | ||
|
||
| These are the pieces you will have to reassemble. Note: If you remove the ignition control module from it's mounting, there is some silicone grease between it and the mounting plate. DO NOT clean this off, unless you plan to replace the grease. It is there to provide a proper heat-sink bond between the two parts. | ||

|
||
| Clean the surfaces and sandwich the new coil between the plates. Heat transfer grease is a good idea between the plates and between the plate and the coil mounting surfaces. Assemble using supplied nuts and bolts or ones of your choosing. My MSD #8226 came with assorted nuts and bolts. | ||

|
||
| Only two studs to put it back on the front of the head! | ||

|
||
| Reattach the bracket, ground lugs and nuts. Plug the harnesses back in. You can use this opportunity to put some dielectric grease on the coil wire tower, if desired. I am using an MSD 6A that requires only one connector where the dual one once was. | ||

|
||
| Put the coil wire back on, reassemble your intake parts, plug your MAF back in and you're done. | ||

|
||
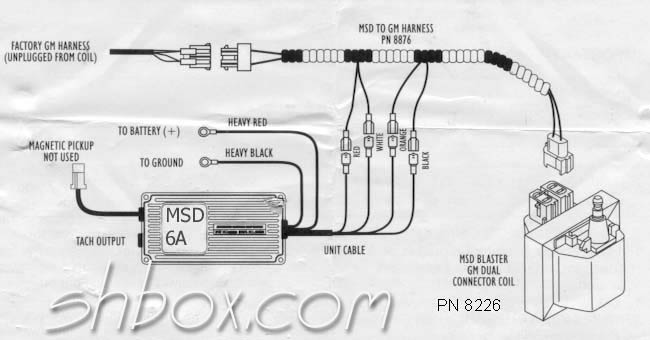
| MSD 6A, harness and coil. | ||
|
||