On some 4th gen Camaros, there is an accessory power feed hidden in the wiring harness under the front of the console. These wires (orange, pink and black) can be used to supply power or ground as needed to any auxiliary equipment you may want to install. I have verified the information only for the 1995 and 1996 model years. I suspected that the 1993-1995 were the same, but I have had at least one person tell me they did not find them on their 1994. Also, a couple of people told me that they did not find them on their 1997 models. Pictures below show where these wires are located on my 1995 Z28.

If you are able to confirm that these wires are present in any other F-bodies other than stated, please email me and I will edit the content of this page.

I recommend that you read through the entire procedure before attempting any work. Use any information provided on this page at your own risk. Take precautions when working on electrical components to prevent problems. Pull fuses if you need to. Use a meter or test light to verify circuits if you are unsure.

See the accompanying tables for fuse locations and conditions.


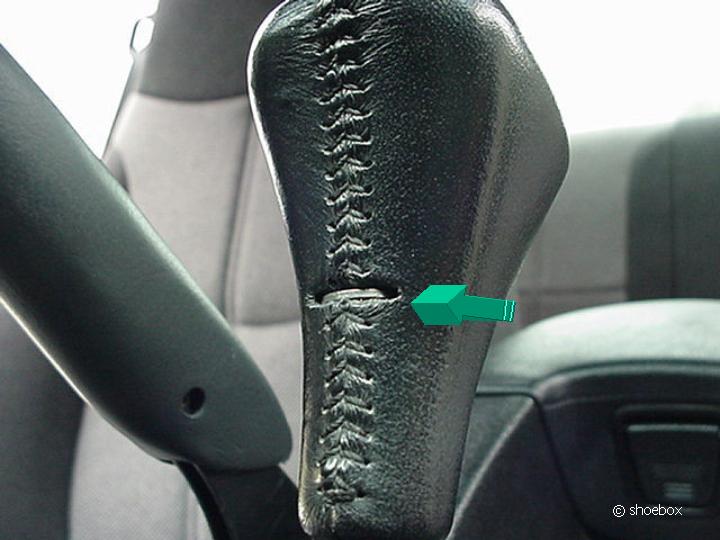
To access the area where the wires are, you will need to remove the shifter opening cover plate. Set your parking brake or block your wheels. On the automatic, move the shift lever back so you can get to the front of the knob. You need to pry out the retainer (looks like a staple on steroids) with a small screwdriver. You can then slip the knob straight up and off. The knob is generally a little sticky and you may have to exert considerable upward pressure. It may come off without warning, so don't smack yourself in the face! Six speed owners can unscrew the knob and then remove the boot and cover plate. Pull up on the rear of the cover plate first and it will easily come off. click to enlarge
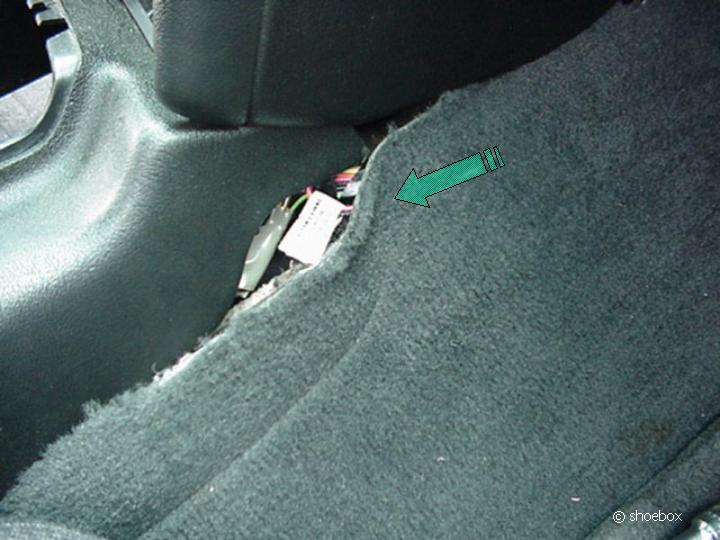
You will find the wires on the right side of the console. I had to remove the mounting bolts for the console to locate the wires, since I did not know exactly where to find them (see exposed tag). I did not have to completely remove the console, though. With the information provided here, you may not have to deal with the console mounting at all. If you do, there are two bolts in the bottom, under the console hatch and one in the very front inside the tape holder. click to enlarge
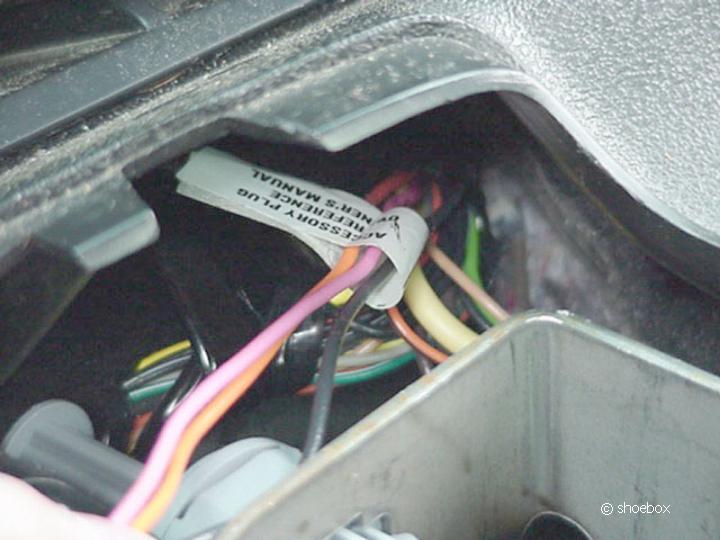
There is a small tag around the wires labeled "Accessory Plug, Reference Owner's Manual". To my surprise, there actually was mention of this in mine. The wires route in the harness from the front of the console rearward, tucked under the edge of the carpet. At the point of the tag, they loop back toward the front. click to enlarge
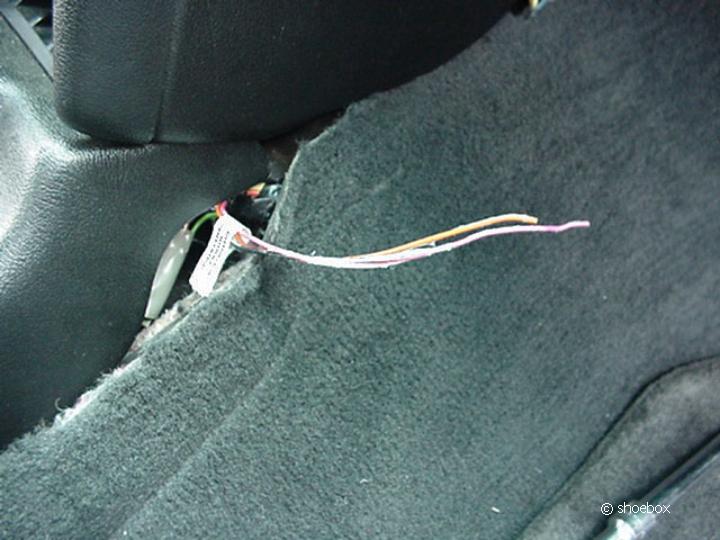
It was a little difficult to fish the wires out because they were secured to the rest of the harness under tape and some kind of sticky white adhesive. If you can find the tag without loosening the console, you can use something to hook around the wire loop (something stiff like a wire coat hanger) and pull back carefully until the free end of the wires come out. click to enlarge
View of the harness with the wires free and the console is in place. click to enlarge


Route whatever wires you need under the console and up to the accessory power wires. Make your connections as you see fit. You can choose to put a plug on the end of the wires, solder and cover with heatshrink tubing, use snap splice connectors, etc. Always adequately insulate your connections from each other and the chassis. Remember to consider the amp rating of what you are going to connect so you don't overload the
fuse . If you are putting in a circuit that merely powers a relay (ex. fan relay), there will not be much current load to worry about.

Note that you can make use of the RAP (Retained Accessory Power, RPO code AU3) feature if your 1995 (and maybe earlier-see beginning text) car is so equipped. This is the feature that retains power to certain devices such as power windows, power door locks, power mirrors, radio, hatch release... for 10 minutes after the key is turned to off and no door is opened. See your owner's manual for more details about RAP.

Also note that factory service manual (Helms) only indicates these wires to be present on the Camaro - not the Firebird.

If you are considering running wires from the interior to the engine compartment, you may want to visit my Firewall Wire Feed page for instructions on how you can make that neat and easy.


1995

Wire Color
PINK
ORANGE
BLACK
Conditions
Hot in Run, Bulb test, Start
With AU3: Hot in Accy, Run and RAP
Without AU3: Always Hot
Ground
Fuse
Gages (fuse #9, 10 amp)
Pwr Accy (fuse #7, 15 amp)
N/A


1996

Wire Color
PINK
ORANGE
BLACK
Conditions
Hot in Run, Bulb test, Start
Always Hot
Ground
Fuse
Gages (fuse #9, 10 amp)
Cigar/Accy (fuse #11, 25 amp)
N/A


Use any info from this site at your own risk. You may link to these pages/images but not copy for the purpose of re-hosting, reselling or publishing without expressed permission.
Picture or text links to auction sites (ex. Ebay) are forbidden.
All rights reserved by shbox.com.


My email is
rob@shbox.com