|
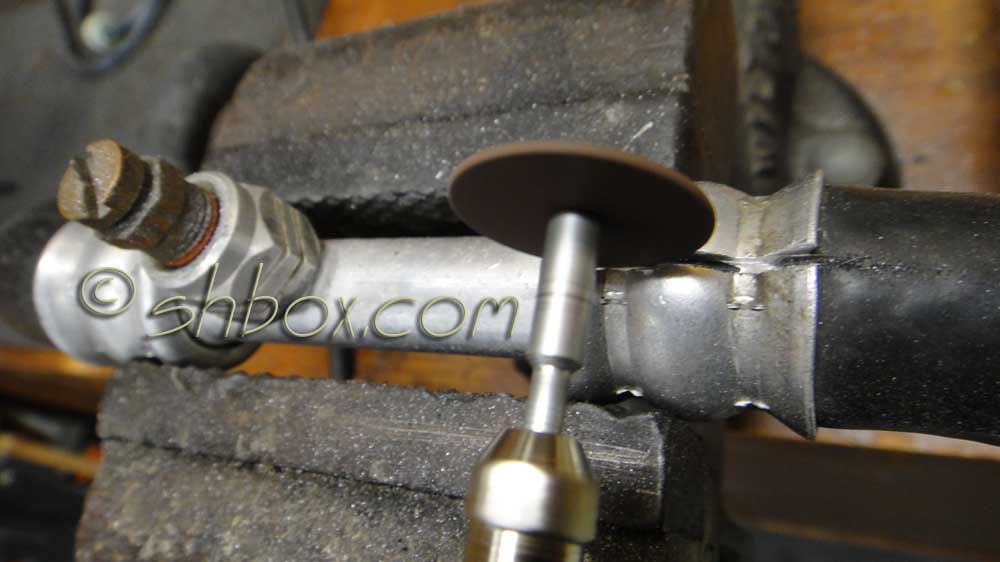
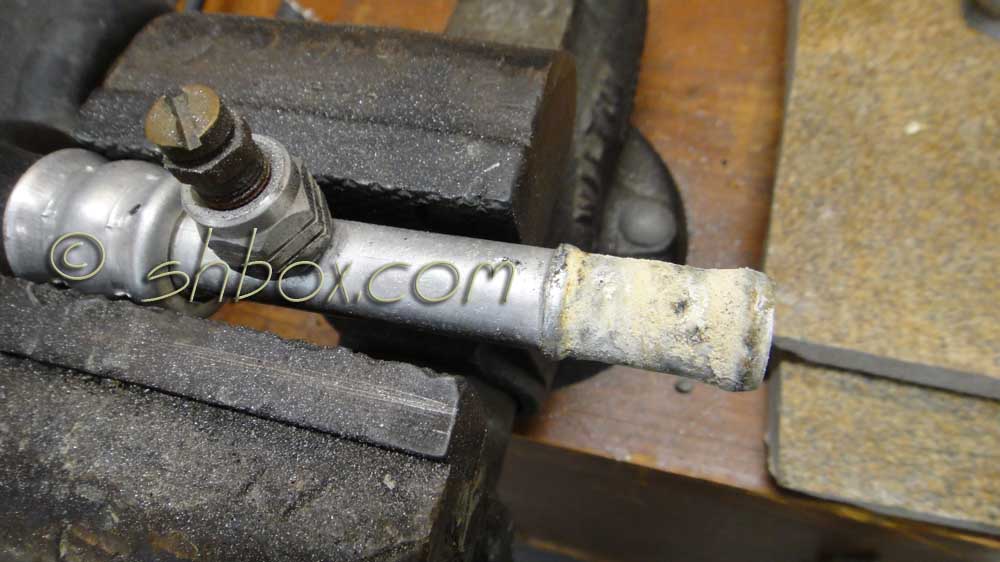
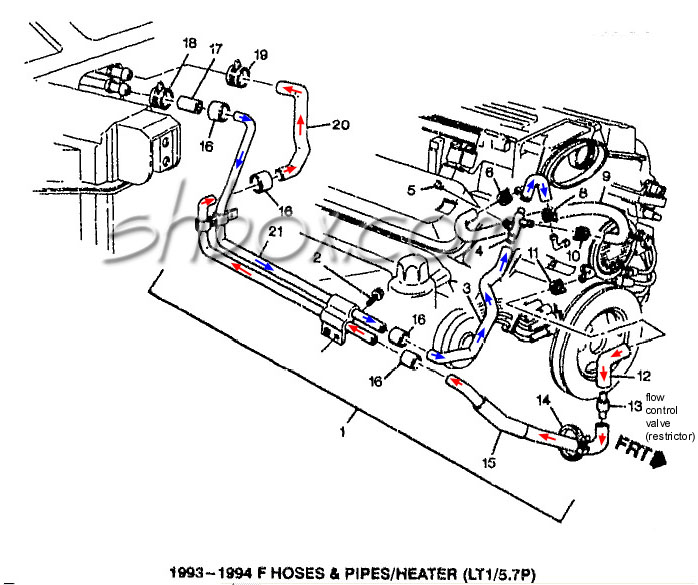
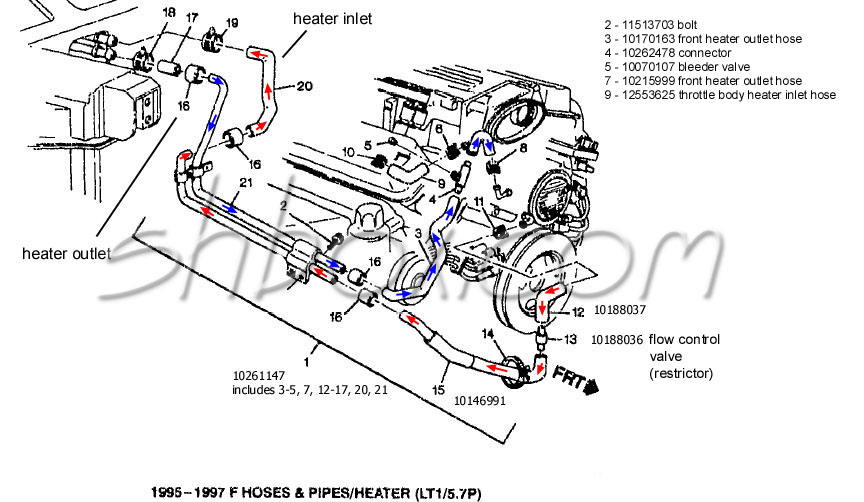
Instead of buying the more expensive complete two hose heater hose assembly, individual heater hoses can be replaced, if you are on a budget. If none of the hoses have been replaced before, keep in mind that they are all of the same age and condition. Here are diagrams of the 93-94 and 95-97 heater hoses. For illustrative purposes, the following pictures were taken with the hose off the car. There will be a little less room to work with the hose on the car. I used a Dremel cut-off wheel to cut through the swaged collar on the hose assy. It makes it an easy job. Other means can be used (ex. hacksaw blade or some type of metal snips) as long as it gets the job done. Make a slit with your tool of choice. Stop when you see the black of the heater hose. You are through the collar. If you go too deep, you run the risk of cutting into the pipe underneath and ruining it. You only have the thickness of the hose until you get to the pipe.
|
||

|
||
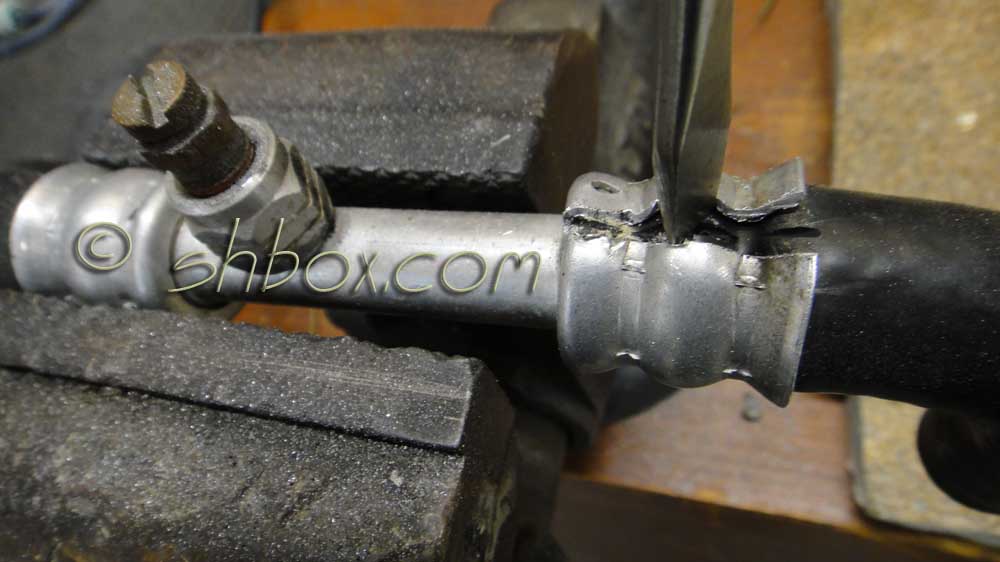
| Pry and peel off the collar. A little bit of the collar on the inside edge may not get cut all the way through (because you were being careful, right?). As you pry and separate the collar, the soft aluminum should allow it to snap open. | ||

|
||
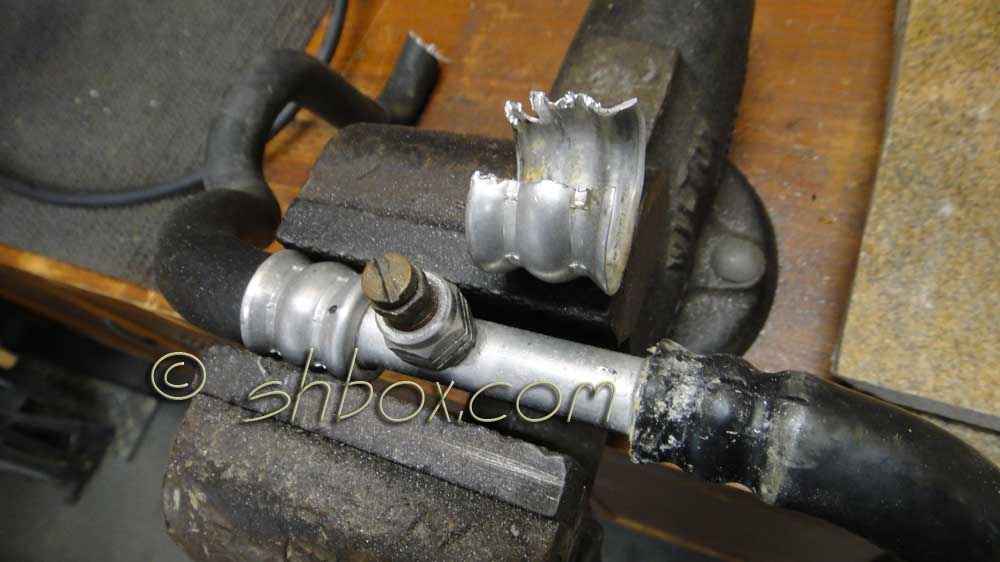
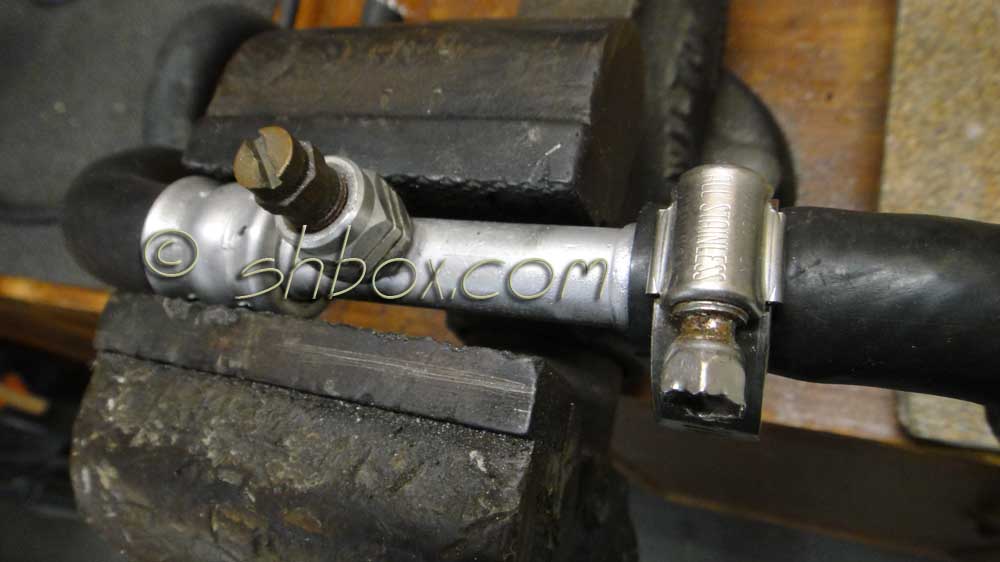
| Now that the collar is off, it is a simple matter of pulling the hose off. | ||
|
||
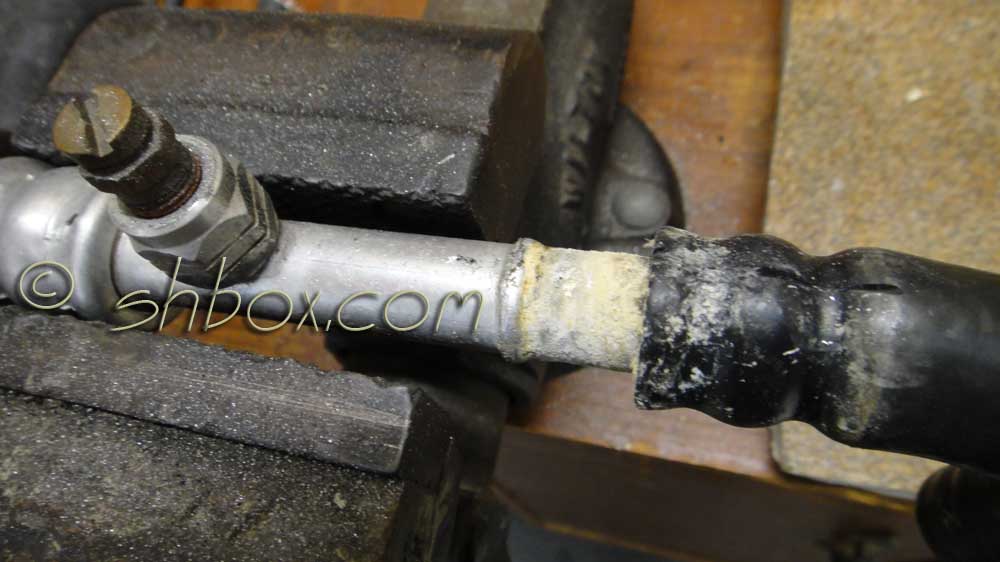
| Clean up the pipe as best you can. I used a wire wheel since this pipe was off the car. A Scotchbrite pad would likely be helpful. | ||

|
||
| Slide your new hose onto the pipe and secure with a normal hose clamp. Refill, bleed and check the system for leaks. | ||
|
||